Hello
evereyone and welcom to My blog , ‘’Draw Anime 4 Pro, in this section will we explain to you how to
draw a japanes Anime face Side view character for beginners ,using simple
materials, ‘’ I Choose to draw ‘’ A Japanes Boy character ,from manga Series .
-First
thing we need is the following furniures:
* we need a
faber Castel Pencil : 3B SIZE to draw face shape
·
Then we need the Steadler 7b Pencil.
·
Black pencil’’More finer’’To outline the Face and Hair
·
Ereaser Marque : FABER CASTLER TO Correct some shapes.
D1 DRAW SIDE VIEW ANIME MALE SHAPE 01
1-So let’s
start drawing ,as you can see the Side view Anime is Totally different from
Front face or normal face drawing, as our character is turnin 90 degree to to left ,it’s specially A portrait
face drawing, so ween to be so careful and focuse more in drawing this Sideview
face.

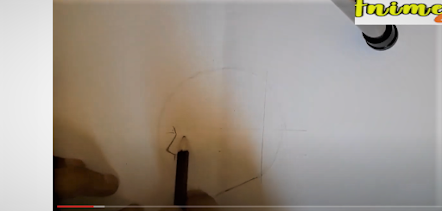
*just start
by drawing a Light Circle using the Pencil faber Caster 3b , large circle
little bite ,then draw a two bending ‘’Lines going through the face .
After
that drawing a horizontal line from the
middle of the Circle AS you see in the Pictue 01
,then you have to draw the nose shape ,starting from the centre of the Circle
shape ,we draw ,just down little bite ,draw the mouth then we move to draw the
Eyes shape ,by always using the Pencil Faber castler.

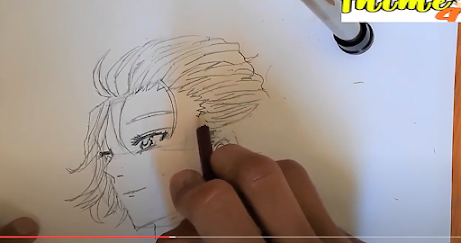
Secondly we draw the Hair by just starting from over the eye little , we
draw hair lines ,from right to left side , then after that we draw the Ears.
-STEP 3 : Draw and Outline with our Steadler 7 B pencil:
Once we draw and complet the Face shape we move to draw ,the face shape,
by outlining with steadler 6B Over the Anime Face character ,starting by the face ,the eyes ,nose ,and
then the Hair .
2/HOW TO DRAW ANIME MALE FACE SIDE VIEW CHARACTER For
Beginner:

HOW TO DRAW Fashion anime Male Side view character:
Hello ,in this tutorial , I will show you how to draw A cute ,fashion anime
face character ,side view for beginners ,using just two pencils : Faber castel
and Steadler 7 B pencil.
So let’s Start drawing: the first thing we Do is to draw a Large Circle
shape for the Face , after that we draw a verticale linge going through the
middle of the Circle ,then another horizontale line going across the center of
circle.as you can see in video.
*after that we draw the Nose shape starting from the left side from
centre of circle .then we draw down with pencil to draw the mouth


Then once drawing The nose shape ,we move to draw the eye ,as you can
see ,we tilt the pencil to right little bit since our chaacter is seeing
sideview ,so just keep bending with your hand ,to perfectly draw the eye

*so just after draw Eye shape we move to draw the eyebrows ,we need to
change our pencil to Steadler 7B to outline and get bright and shining eyes,
then after we move to draw the Hair shape ,by starting from top Of the head
So we keep drawing the Hair shape ,using HB pencil ,then ,continue to
draw the left Eye of the using the Pencil Steadler 7B ,then wo move down to
complet the Face cheeks ,so be careful to keep bending your hand to draw accurately
professional Face cheeks.
Video tutorial about How to draw anime male face:


